How to modify the Lex 35/Vivitar T100 toy camera for multiple & bulb exposures
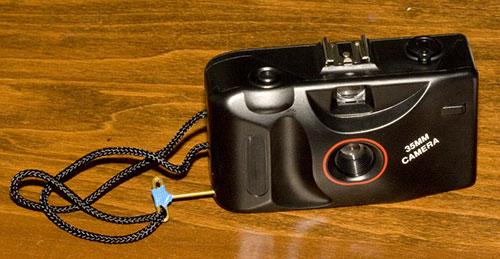
The Lex 35 is a toy/crap camera that's available for US $1.50 from American Science & Surplus. Lest you be tempted to splurge for the Vivitar T100 for US $7.50, be aware that it's the same camera as the Lex 35 except that it has a tripod mount and says Vivitar on the front. Hardly worth the extra six bucks IMO, but these instructions apply to both.
The Lex 35/T100's shutter cocking mechanism is coupled to its film advance, so reliable multiple exposures are out on a stock model. If you've got a screwdriver, a metal coat hanger, a pair of pliers, and some tape, this is not a problem. This will show you how to add a key that will cock the shutter without touching the film advance and allow you to shoot multiple exposures with impunity as well as how to block the shutter from closing, allowing you to keep it open as long as you want.
I say that reliable multiple exposures are out on a stock camera. It is possible to make doubles by pressing up hard on the film rewind button on the bottom of the camera, which [theoretically] disengages the sprocket wheel that advances the film and cocks the shutter normally while leaving the film where it is, but on my two Lex 35s and one T100, the advance always moves. Less than usual, but it won't give me an in-place double. Apparently it works fine on some copies of the camera and not on others. This mod gives me repeatable results without moving the film at all. Your mileage may vary.
- Read and follow Eben Ostby's disassembly instructions and notes in the trashcams group on Flickr.
-
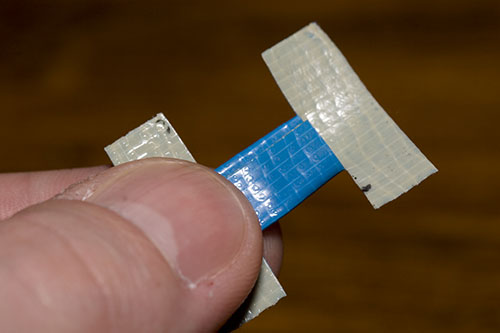
Cut and fold a piece of tape like this. The tape will form a tunnel for the key to go through and folding the middle under will create a non-stick surface so the key can slide. -

Cut and bend a section of metal coat hanger like so. This will be inserted through the hole you're about to make in the body and push the cocking mechanism. There should be at least 65mm from the tip to the first bend. -
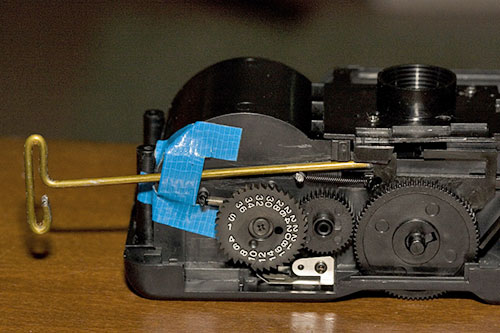
Place the tape over the key as shown. The part of the tape that goes over the key shouldn't have any sticky bits on it or the key won't be able to move. The bit that the end of the key is touching is the cocking assembly, which functions by being pushed to the right. When the shutter fires, it shoots back to the left, so for multiple exposures, you need to retract the key when you actually shoot or it will block the shutter from closing normally; for bulb exposure, you need to keep it there (see below in the "To use" section). -
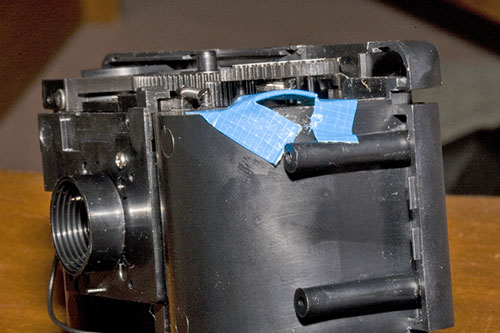
You should have a little tunnel of tape like this. Give it a little slack as you'll have to slide the key through this without being able to see it. -

Line it up as well as you can and make a hole in the front shell. As you can see, it took me a few tries to get it right. The plastic is soft enough that you can bore through it with a screwdriver, no drill required. -
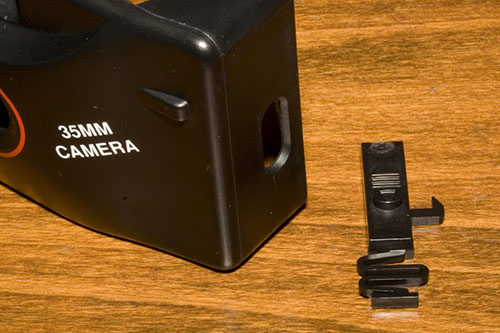
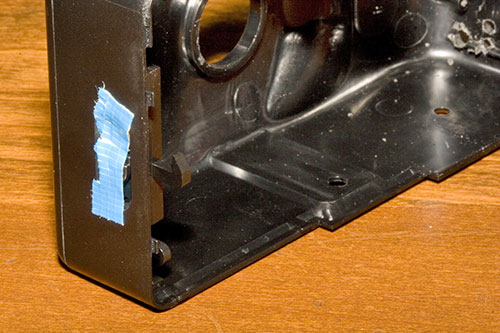
Put it back together. Taping the back release to the shell from the outside keeps it in place while you put the rest of it together and makes things much easier. -
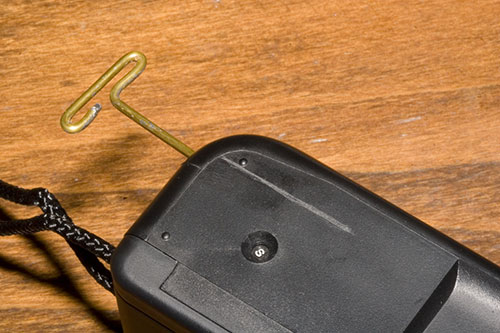
Put the key in an feel around until you get it cocked (remember to trip the shutter first so you're not trying to cock it while it's already cocked) and scratch a guide line in the bottom along the path of the key. This makes it much easier to aim the key correctly and hit the right spot for shooting. -

Hook the key onto the strap and tape it for safety. Ready to roll!
To use
The mod doesn't affect normal single-exposure operation, so shoot as usual for that.
Multiple exposure
Shoot the first exposure on the frame as usual, but don't touch the film advance wheel afterward. Put the key in, use your scratched guide line to line it up, and push the cocking assembly over until you hear it click and remove or back the key out a bit. Once you do, it's cocked and ready to shoot the next exposure on the frame. Repeat as many times as desired. Once you've shot the last exposure you want on that frame, use the film advance wheel as you normally would.
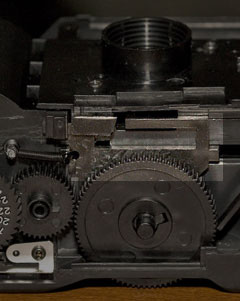 Fired/uncocked shutter cocking mechanism |
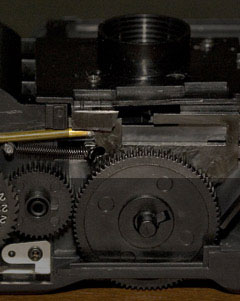 Key pushing shutter cocking mechanism into cocked position. Note the position of the highlighted plastic assembly and the extended spring on the left. When the shutter fires, a latch is released and the spring tension pulls the assembly back to the left, tripping the shutter on the way. |
Bulb exposure
Bulb mode is a bit more of a pain. Put the key in, make sure the shutter is cocked, back it off 6.5mm (you'll probably want to mark that with a permanent marker on the key), and press the shutter release to take the picture. To close the shutter, pull the key out. The shutter tends to close a bit slowly, talking half to a quarter of a second once the key is pulled. Since the key is blocking the cocking mechanism from returning, the key is in control and releasing the shutter button has no effect.
Thanks to Katie Cooke of slowlight pinhole blog for sanity-checking this how-to!
Sorry about the crap lighting. It's a Sunday night and I'm too lazy (and don't currently have the space) to set up a tripod to do it properly, so the glare of the flash will have to do.

