Instructions have just been posted for the following Holga modifications:
Paul Williamson‘s Squarefrog Holga site is quickly becoming the one-stop shop for Holga information, check it out!
Instructions have just been posted for the following Holga modifications:
Paul Williamson‘s Squarefrog Holga site is quickly becoming the one-stop shop for Holga information, check it out!
Tim Haynes writes:
I was looking for a cheap and convenient way to make small enlargement prints, particularly from 5×4″ black and white negatives, but without the expense of buying a proper large-format enlarger (to say nothing of the space such a thing would occupy).
Does that sound like you? Sounds like me! Check out his set-up.
Most large format lenses are mounted in shutters, as focal plane shutters for large format are extremely rare. Barrel lenses don’t have them, and are generally used with very slow film and historical plate processes, where the shutter time is long enough that you can just remove the lens cap to make your exposure. What happens when you want to use a barrel lens with modern, faster film?
Enter the Jim Galli shutter, which is a free DIY arrangement:
Drum roll please. The world has been waiting for me to invent this.
Having just purchased a few old LF lenses without shutters, I actually have been waiting for him to invent this. Check it out at APUG.
f295 member MarkB has instructions for making a sweet-looking sliding bar mount for stereo/3D photography. He writes:
The slide bar allows you to take 2 sequential, side-by-side photos of the same scene, rather than simultaneously exposing 2 images.
This took 2 or 3 hours to put together. Mainly I’ll just show photos below with a few tips, rather than step-by-step instructions. It’s pretty easy and self-explanatory.
Total cost to me was about $2 for a package of threaded inserts. I had all the other materials on hand (scraps from earlier projects). If you had to buy all the materials you could still do it for under $10…
Check it out in the f295 DIY Photography Forum, includes photos

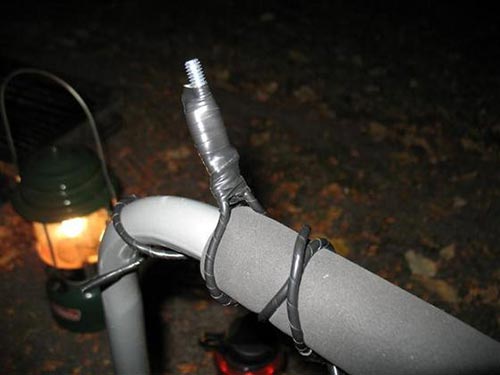
Here’s a DIY version of the GorillaPod, a portable, flexible tripod. The GorillaPod is expensive and not very stable, even with a small pocket digicam. Hopefully this will get the same or better stability for way less money. Looks like it should at least be able to hold your standard lightweight piece-of-shit plastic toy camera or converted pinhole.
Read instructions at Instructables
See also: Monkey Arm flexible tripod from Munkey Film
Via MAKE Blog via Lifehacker
There’s now a growing database of Leica’s lens codes for use on the M8. Why pay $120 and wait 6–8 weeks to have Leica code your lenses when you can do it yourself with a marker?
Check out this how-to by Mike Prevette on the Leica user forums for details.
Previous posts on the subject: Hacking Leica digital lens coding, Leica M lenses coding for digital, Free digital coding upgrade on new Leica lenses in US & CA
Via the ever-vigilant Auspicious Dragon Photostream
As I posted previously [1, 2], Leica have a coding scheme for their lenses so that the new digital M8 body can automatically identify the mounted lens. It turns out that you can use a marker to code the lenses rather than paying Leica US $120 per lens for six dots of paint. You can use the same method to trick the body into thinking you have a different lens mounted than you actually do.
Check out this how-to by Mike Prevette on the Leica user forums for details.
Check out BURNBLUE‘s long exposure Holga mod, no modification required! In the "why the hell didn’t I think of that??" class of genius.
See also: Sean Rohde‘s Homemade underwater Holga enclosure
Homemade by Flickr member [J°Sh], who also brought you his homemade magnifying glass lens. Genius.