How to flip the lens on a Lex35/Vivitar T100 crapcam

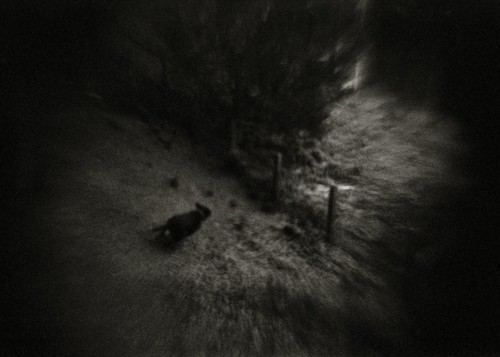
Addled dog chasing ball by Eben Ostby

The Lex35/Vivitar T100 is a crappy, hackable, cheap, plastic camera. Above is Eben Ostby‘s result from flipping and spacing the lens. He writes:

I don’t have pictures to show what I did, but if you look at my photostream, you’ll see a few "addled" photos that were done with a Lex 35 with a flipped lens. Here’s what I did:

Took apart the Lex35 [Eben’s instructions, with photos, are here].

Took the lens "board" off by removing its two screws. On the back of the lensboard, there’s a plastic ring that holds the lens in place, and which can be popped off by prying it gently with a screwdriver or such.

The lens comes out and can be reversed and placed in the front part of the lens-holder – in the stepped rings that are visible from the front. I used a thick washer to hold it in place, but you can improvise something else… tinfoil, glue, putty… I dunno. With the lens pushed as far back as I could get it to go, it the camera "focuses" (if that’s really the word) from about 2 feet to 30 feet. Sort of.

I also tried flipping the lens around but putting it back in the back part of the lensboard. If you do this, you’ll need to shim the lensboard away from the body of the camera, and use longer screws (such as the ones that hold the body of the camera together). And the focus is worse.

I’ve gotta say, I’m thrilled at having a screwed up Lex35 like this. It just made my week.

You can pick up a Vivitar 100 (same as the Lex35 except it has a tripod mount) for US $1.95 from American Science & Surplus.

Related: Lex 35/Vivitar T100 bulb shutter/multiple exposure mod how-to here on Photon Detector

How to modify a Polaroid SX-70 for 600 film

Adrian Hanft (of Lego pinhole camera fame) wrote a nice, step-by-step tutorial on converting a Polaroid SX-70 camera—whose Time Zero film has been discontinued—to take the still-available 600 film. He writes:

Polaroid 600 film actually fits in an SX-70 camera pretty easily. The problem with using 600 film in the SX-70 is that it is four times more sensitive than SX-70 film. Without modification, all your photos taken with 600 film would be overexposed. To correct this problem, we are going to adjust the camera by two stops. We will use a one stop neutral density filter to cover the lens, and we will remove the neutral density filter that covers the photocell. If you are wondering why we are adjusting by two stops when the film is four times faster, here is a quick math lesson. One stop is equivalent to doubling (or halving depending on which direction you are going) the amount of light. So, 2×2=4. Alright, lets get started.

Read tutorial at Found Photography

How to build and calibrate a photo-plane light meter

Science photographer Ted Kinsman wrote this piece on building and calibrating a photodiode-based light meter:

Being in the professional science photography business, I often get asked to photograph the strangest stuff using some very weird lens combinations. Lately, I was asked to take some motion pictures of "microscopic animals". So I set up the microscope and attached it to a 35-mm motion picture camera – but how do you measure the exposure?

A typical answer would be to use a standard film plane meter, but such a device would not fit my situation, and I would still have to perform a calibration on the device.

The answer to my problem was to simply build the type of meter I needed and then calibrate the device…

Continue reading at Microscopy-UK

Via Paul Beard of A Crank’s Progress blog

Homemade underwater Holga enclosure

moominsean writes on his excellent blog, moominstuff:

I’ve been wanting to turn my Holga into an underwater camera for awhile, and finally got around to building a waterproof casing. I spent many hours on the design and implementation, making sure the seal was absolute, as you can see…

Check out his sweet home-built underwater Holga enclosure and sample photos—this thing has to be seen to be believed!

MAKE video poscast: make a kite arial photography rig

MAKE sez:

For this weekend project, I’ve made a Kite Arial Photography Rig (KAP). This was one of those projects that require remaking multiple times to get it so that it would fly. I started with a VEX robotics kit and then had to make lots of changes to make it lighter. Watch the video to learn more! For more instructions, please read the instructional post.

Visit MAKE for a variety of downloading options.