Strip photography with a Hasselblad V-series

beige ford explorer by a nose strip photo by Dan Loflin

Wicked-talented photographer Dan Loflin has written up a tutorial on strip photography with a Hasselblad V-series camera and A-series film magazine (he used an A12 back on a 503cw). Check it out:

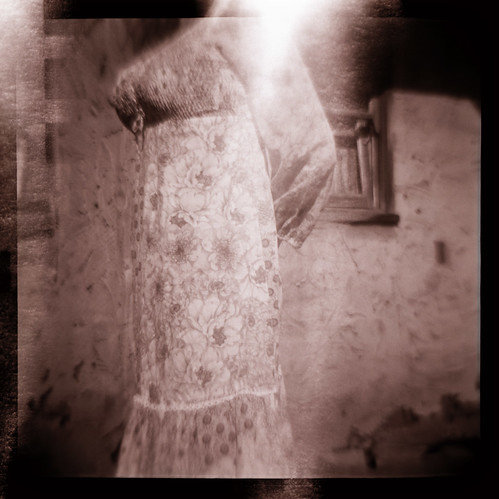
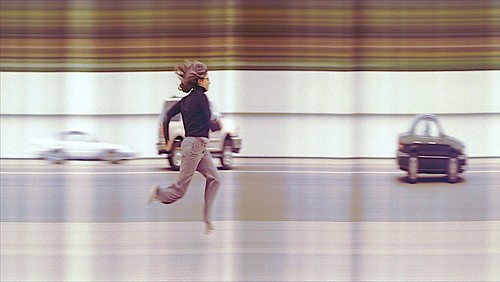
It’s pretty simple to rig a hasselblad into an amatuer strip camera, as I’ve done, without altering the mechanics of the camera in any way. However, the results won’t be as perfect as Scott’s (photoace) without a motor drive. You’ll probably get the horizontal banding and inconsistently shaped subjects that you see in my photos. I personally like those qualities, but some might not. I’m working on a bracket not too dissimilar from [Andrew] Davidhazy‘s to take more control over these qualities on my next go ’round.

1 – Creating the 1mm slit: On the back of the camera body, surrounding the rear curtain, is a beveled ridge that mates perfectly with the magazine to seal out the light. Inside that bevel there is enough space to tape two small, thin pieces of black cardboard to leave a 1mm slit. You’ll want to mount the card board so the slit runs horizontally, as the film in a hasselblad runs vertically. I used some really nice, super black, soft-tack permacel paper tape to secure them…

Continue reading instructions and discussion in the Strip Photography group at Flickr

While you’re at it, have a look at Loflin’s photography. He’s a one-man photograpic freakshow who’ll seemingly try any process at least once—and rock it. Even his masking material is pimpin’; Permacel is the Cadillac of gaff photo tape.

Michael Reichmann on soft proofing

Michael Reichmann of The Luminous Landscape has written a typically lucid article on soft proofing:

Soft proofing is simply a mechanism that allows you to view on your computer monitor what your print will look like when it is on paper. A specific paper. That paper and ink combination has been defined by the profile that you or someone else has made for your printer / paper and ink combination. When a printer profile is made the colour of the paper is one of the factors that is figured into the profile, because the spectrophotometer is reading the combination of the ink, and the paper that lies beneath it.

So, if you were able to view your image through the printer profile, you would be able to see how that particular combination of ink and paper would reproduce it, taking into account the gamut as well as other characteristics of the inks used.

Continue reading on The Luminous Landscape

Two-part light leaking tutorial

Untitled Diana photograph with light leak by Sean Rhode

Photographer moominsean put together a great two-part tutorial/explanation of what light leaks are and how to avoid them or get them on purpose. (See the bright bits coming down from the top on his [utterly brilliant] photo above? That’s them!)

Part one deals with leaks caused by the camera—very common with toy and home-built cameras—while part two deals with the winding of medium format film, which may be of particular interest to Zero Image pinhole shooters.

You can also create lightleaks on film after you have shot the roll (or, theoretically, before, but I haven’t tried this). When you see really strong, overpowering lightleaks, chances are it’s not the camera, but the handling of the film…

Check them out at his new blog, moominstuff: part 1part 2

New cyanotype book from AlternativePhotography.com

(The book is called Blueprint to cyanotypes: Exploring a historical alternative photographic process and costs US $34.)

Alternative Photography press release:

Malin Fabbri and Gary Fabbri have written a clear and well illustrated step-by-step guide to making cyanotypes. It is easy to follow for the beginner and an inspiration for the more experienced photographer.

The cyanotype is often the first alternative process that people try. Digital photography has given this historical process new life, now you can create negatives in your computer and develop the prints in the sun, combining one of the earliest photographic techniques with the latest. The cyanotype process is a perfect compliment to today’s digital photography, whether you are making creative prints or fine art. It gives experienced photographers and artists a great excuse to take their eyes off the computer screen and get their hands dirty. Blueprint to cyanotypes is all you need to get started with cyanotypes. It is full of information and tips. It is also inspiration to see samples of 19 artists currently working with cyanotypes.

Blueprint to cyanotypes is published by AlternativePhotography.com – a website and information center for alternative photographic processes, dedicated to education and research. The website currently represents over 200 artists and continues to grow.

Information About the Book

Publisher: AlternativePhotography.com (2006)
Printed by: Lulu.com
Format: Paperback, 68 pages, full color
ISBN: 978-1-4116-9838-3
More information: http://www.alternativephotography.com/BlueprintToCyanotypes.html

Blueprint to Cyanotypes is available for purchase at www.lulu.com/alternativephoto, a print on demand service.

About the Authors

Malin Fabbri, from Sweden, has over 8 years of printing experience in cyanotypes and teaching workshops. Blueprint to cyanotypes is a result of a Masters thesis from Central St. Martin’s School of Design in London, in "alternative photography". The research for the thesis involved a lot of work with cyanotypes and also sparked the idea for the book. Malin also started the website, AlternativePhotography.com – an information centre for historic photographic methods in use today. She is still actively managing its expansion as the editor. Gary Fabbri is from Rhode Island, USA. An early interest in writing and drawing led him to pursue both fine art painting and writing. His paintings have been exhibited throughout the east coast. His master’s thesis lead him to find work in the television industry and he moved to London to work as an editor and writer/director. As a director Gary has made numerous shortfilms, television adverts, programmes and documentaries. Gary and Malin moved to Stockholm in 2004 where Gary runs his own company, and continues to write, direct, paint and make cyanotypes.

More info and buy from AlternativePhotography.com

Polaroid emulsion transfer tutorial

Check out this well-written Polaroid emulsion transfer tutorial, with examples, by Sarah Wichlacz:

Polaroid transfers have a unique visual style that is a little ghostly, a little impressionistic, and often very moody. Needless to say, it’s a fun way to spice up found slides and staged photos. With a few readily-available supplies, we can make a whole bunch of transfer prints.

Continue reading at SarahWichlacz.com

Via MAKE Blog

How to easily etch images in copper

Check out this tutorial for etching images in copper onto circuit boards!

I suspect that there’s a lot more that can be done with the plates than meets the eye. Things that immediately come to mind are a variety of chemical tarnishings, using it as a printing plate on paper, several possibilities for magnetically aligning ferrous powders (think chaotically textured relief prints!), or any combination of the above. There’s got to be more, what did I miss?

Read instructions at Instructables

Via MAKE Blog

Woodburytype and ziatype alt process how-tos

AlternativePhotography.com have two new how-tos up, one each for woodburytype and ziatype printing.

Woodburytype

"The woodbury type/woodbury process by Nicolai Klimaszewski is an interesting take on carving. Read and learn."

"Woodburytype images are made by pouring a translucent mixture of pigments suspended in warm gelatin onto a relief surface, then transferring this pigment layer onto paper. In this case, the thick and thin areas of gelatin, along with the white of the paper produce a wide range of beautiful tones. I state that the tones are beautiful because the thickness and translucency of the pigment layer provides a remarkable kind of color that a conventional flat deposit of ink cannot achieve…"

Continue reading the woodburytype how-to at AlternativePhotography.com

Ziatype

"The Ziatype process is an extract from Christina Z. Anderssons book Alternative Processes Condensed. The article here has been illustrated by Carl Weese‘s beautiful prints."

"The ziatype is a variation of the Pizzighelli POP process that uses lithium palladium chloride (lithium chloropallidite) as the primary metal and ammonium ferric oxalate for the iron compound to produce a continuous tone print. Color and contrast are controlled chemically, unlike other Pizzighelli processes where color and contrast are controlled by humidity…"

Continue reading the ziatype how-to at AlternativePhotography.com

(POP is Printing Out Paper, where the image becomes visible as it is exposed, as opposed to the standard Developing Out Paper, which is exposed and then needs to be bathed in liquid developer before the image becomes visible.)

Free Polaroid image transfer e-book by Holly F. Dupré

Fine art photographer Holly F. Dupré, has published an e-book, Polaroid Image Transfers – Tools & Techniques. It’s clearly written, covers everything from film and paper characteristics to manipulations to mounting and reproduction for press. Essentially, this is an ass-kicking document from start to finish. And it’s free! Thank you Ms. Dupré!

Continue to the intro page or download the PDF directly.

Via Heather Hollingdale

Split toning info from Jonathan Bailey

Photographer Jonathan Bailey has written a two-part article on the split toning of prints.

"…split-tones refer to both warm and cold tones simultaneously present in an image. Whereas conventional toning (sepia, for example) will render a print a uniform chocolate brown color, split-toning typically yields shades of reds and blues – occasionally even greens and violets – and therein lies the difference. The effects may range from subtle to extravagant. Generally speaking, split-tones are the result of chemical toners used after normal processing and fixing…"

Part one, Background and Historical Antecedents, is from the from the December 2000/January 2001 Issue of Camera Arts.

Part two, Processes and Procedures, is from the February/March 2001 issue of Camera Arts.

Canon launch Flash Work site for EOS flash photography

Canon just launched a new mini-site dedicated to flash photography with the EOS/EOS Digital + Speedlite combo. It also has a Lighting Techniques section with diagrams and example photos that applies to flash in general.

Also, I strongly recommend that anyone using EOS flash—on film or digital bodies—read NK Guy’s excellent article, Flash Photography with Canon EOS Cameras, on photonotes.org, as many times as it takes to truly understand it. It’s long and complicated, but explains exactly how the whole system works, and has definitely helped me make better flash photos with the EOS system.